-
Right-click the My Computer icon on your desktop,
and click Manage.
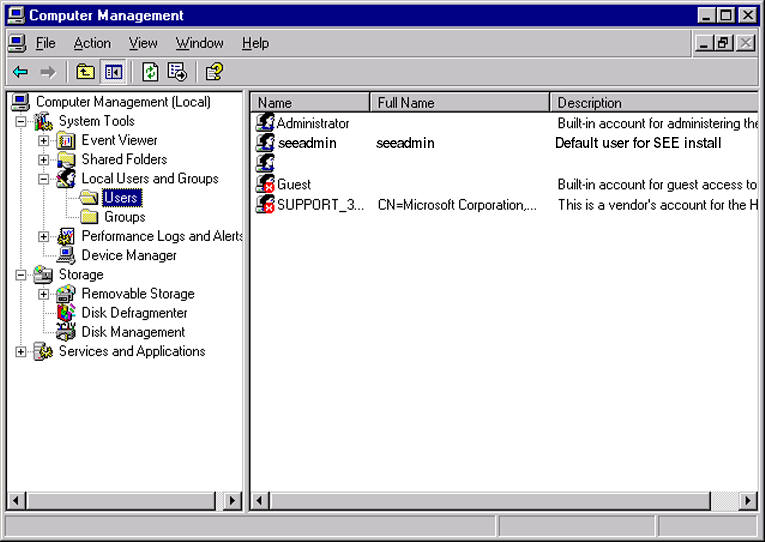
The Computer Management dialog box appears.
-
Click Local Users and Groups on the left side
of the dialog box.
User and group information appears on the right side of the dialog box.
-
Double-click the Users folder on the right side
of the dialog box to display all current users on the system.
-
Right-click the Users folder on the left side
of the dialog box, and select New User....
The New User dialog box appears. You can choose any name you want for the user (be sure to write it down).
In the instructions in this manual, the
default user name seeadmin is used.
Once the user name is set, it cannot be changed. The SIMULIA Execution Engine
database will not run correctly if the user name is changed during or
after installation.
-
Type the name of the new user in the User name
text box; for example,
seeadmin.
-
If desired, type a more descriptive string in the Full Name text
box.
-
Type a description in the corresponding text box; for example,
Default user for SEE installation.
-
Type a password for the user account in the Password text
box, and retype the password in the Confirm password
text box.
The password must conform to any local security policies; otherwise,
the creation of the password will fail with a generic message stating
that the user cannot be created. For more information, see Checking Password Policies.
-
Set the password options below the Confirm password
text box, as desired.
-
Click Create.
-
Click Close.
You are returned to the Computer Management dialog
box, and the new user is displayed.
-
To set the properties for the new user, right-click the new user, and
select Properties.
The Properties dialog box appears.
-
Select the Member Of tab.
-
Click Add.
The Select Groups dialog box appears.
-
Click Advanced.
-
Click Find Now.
Double-click Administrators from the list at
the bottom of the dialog box.
Administrator privileges will be assigned to the new user. These privileges
are for SEE installation purposes only. Once installation is complete, you
should convert the user to a regular (non-administrative) user.
-
Click OK.
You are returned to the Properties dialog box.
-
Click OK.
You are returned to the Computer Management dialog
box.
-
Close the Computer Management dialog box.
-
If necessary, configure the new user as described in Setting the seeadmin User Privileges.
|